
Initial reflections in the close / immediate environment around the shooter (6-24ft)
Introduction
My name is Aaron, and I am the field recordist for the Master Gun Armory Bundle. Over the last 5 years, I’ve recorded hundreds of firearms spanning every weapon category imaginable (Pistols, SMGs, Shotguns, Sniper Rifles, Assault Rifles, DMRs, Anti-Material Rifles, LMGs, MGs, and HMGs I’ve also sampled over 100 Suppressed firearms across the same categories. My sounds have been featured in games such as Battlefield 6, Hell Let Loose Vietnam, Delta Force, Day Z, Spltigate Arena Reloaded, & Squad
In this article, I’ll show you how I capture the unique character of each weapon, with particular attention to close and mid-range perspectives and the recording environments that preserve what makes each firearm distinct across hundreds of weapon libraries within the Master Gun Armory. We’ll break down the four core layers of a gunshot, discuss microphones, placement strategies, field recorders, explore recording environments, examine our approach to foley, and reflect on key discoveries from the past five years.
Recording Equipment
Field Recorders
When it comes to clean 32-bit float recordings, nothing comes close to the sound of the Kashmir preamps in the Sound Devices Mix Pre-Series. When I started recording for the Master Gun Armory Bundle I used x2 Mix Pre-10 IIs and x1 Mix Pre-6 II. This gave me 20 channels of recording.
With some advice from industry professionals, I have since expanded our firearms recording rig to 3 Mix Pre-10 IIs and 1 Mix Pre-6 II giving us 28 channels of 32bit float 192kHz recording power.
So Why Use The Sound Devices Mix Pre-Series?
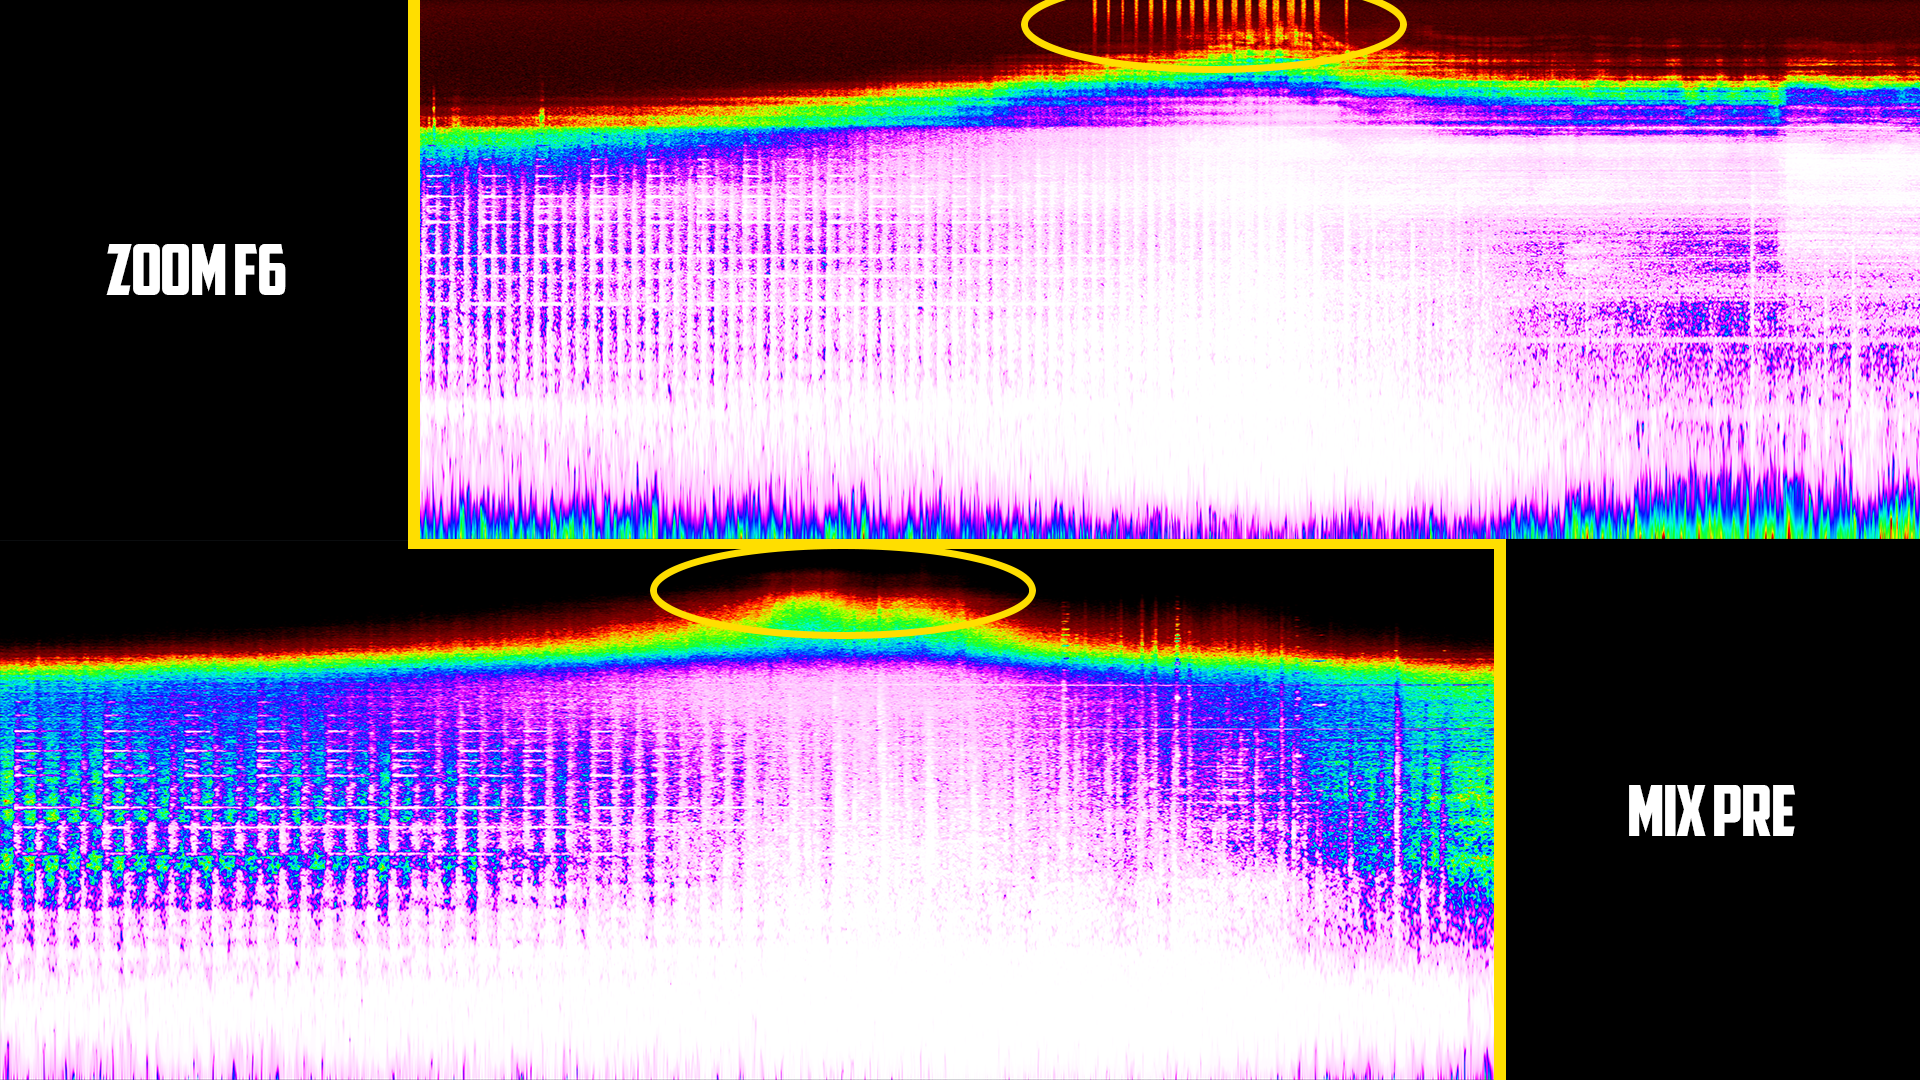
We’ve have ran several tests over the years on several different recorders and how each recorder handles 32bit float recordings of extremely high dynamic range sounds (Like firearms). We’ve found that quality of the three Analog-To-Digital Converters (ADC) in the Sound Devices Mix Pre’s minimizes the spectral tearing you get when the recorder switchs between ADCs when compared to other recorders which only use two ADC’s.
Below is a recording recording of a Steam Train passby which was simultaneously recorded using the Zoom F6 & the Mix Pre-10 II 32bit float recording modes. Here you can clearly see the noise bursts on the Zoom F6 as the recorders switch between the high gain ADC and the low gain ADC. This noise burst lasts for several milliseconds and is broad spectrum.

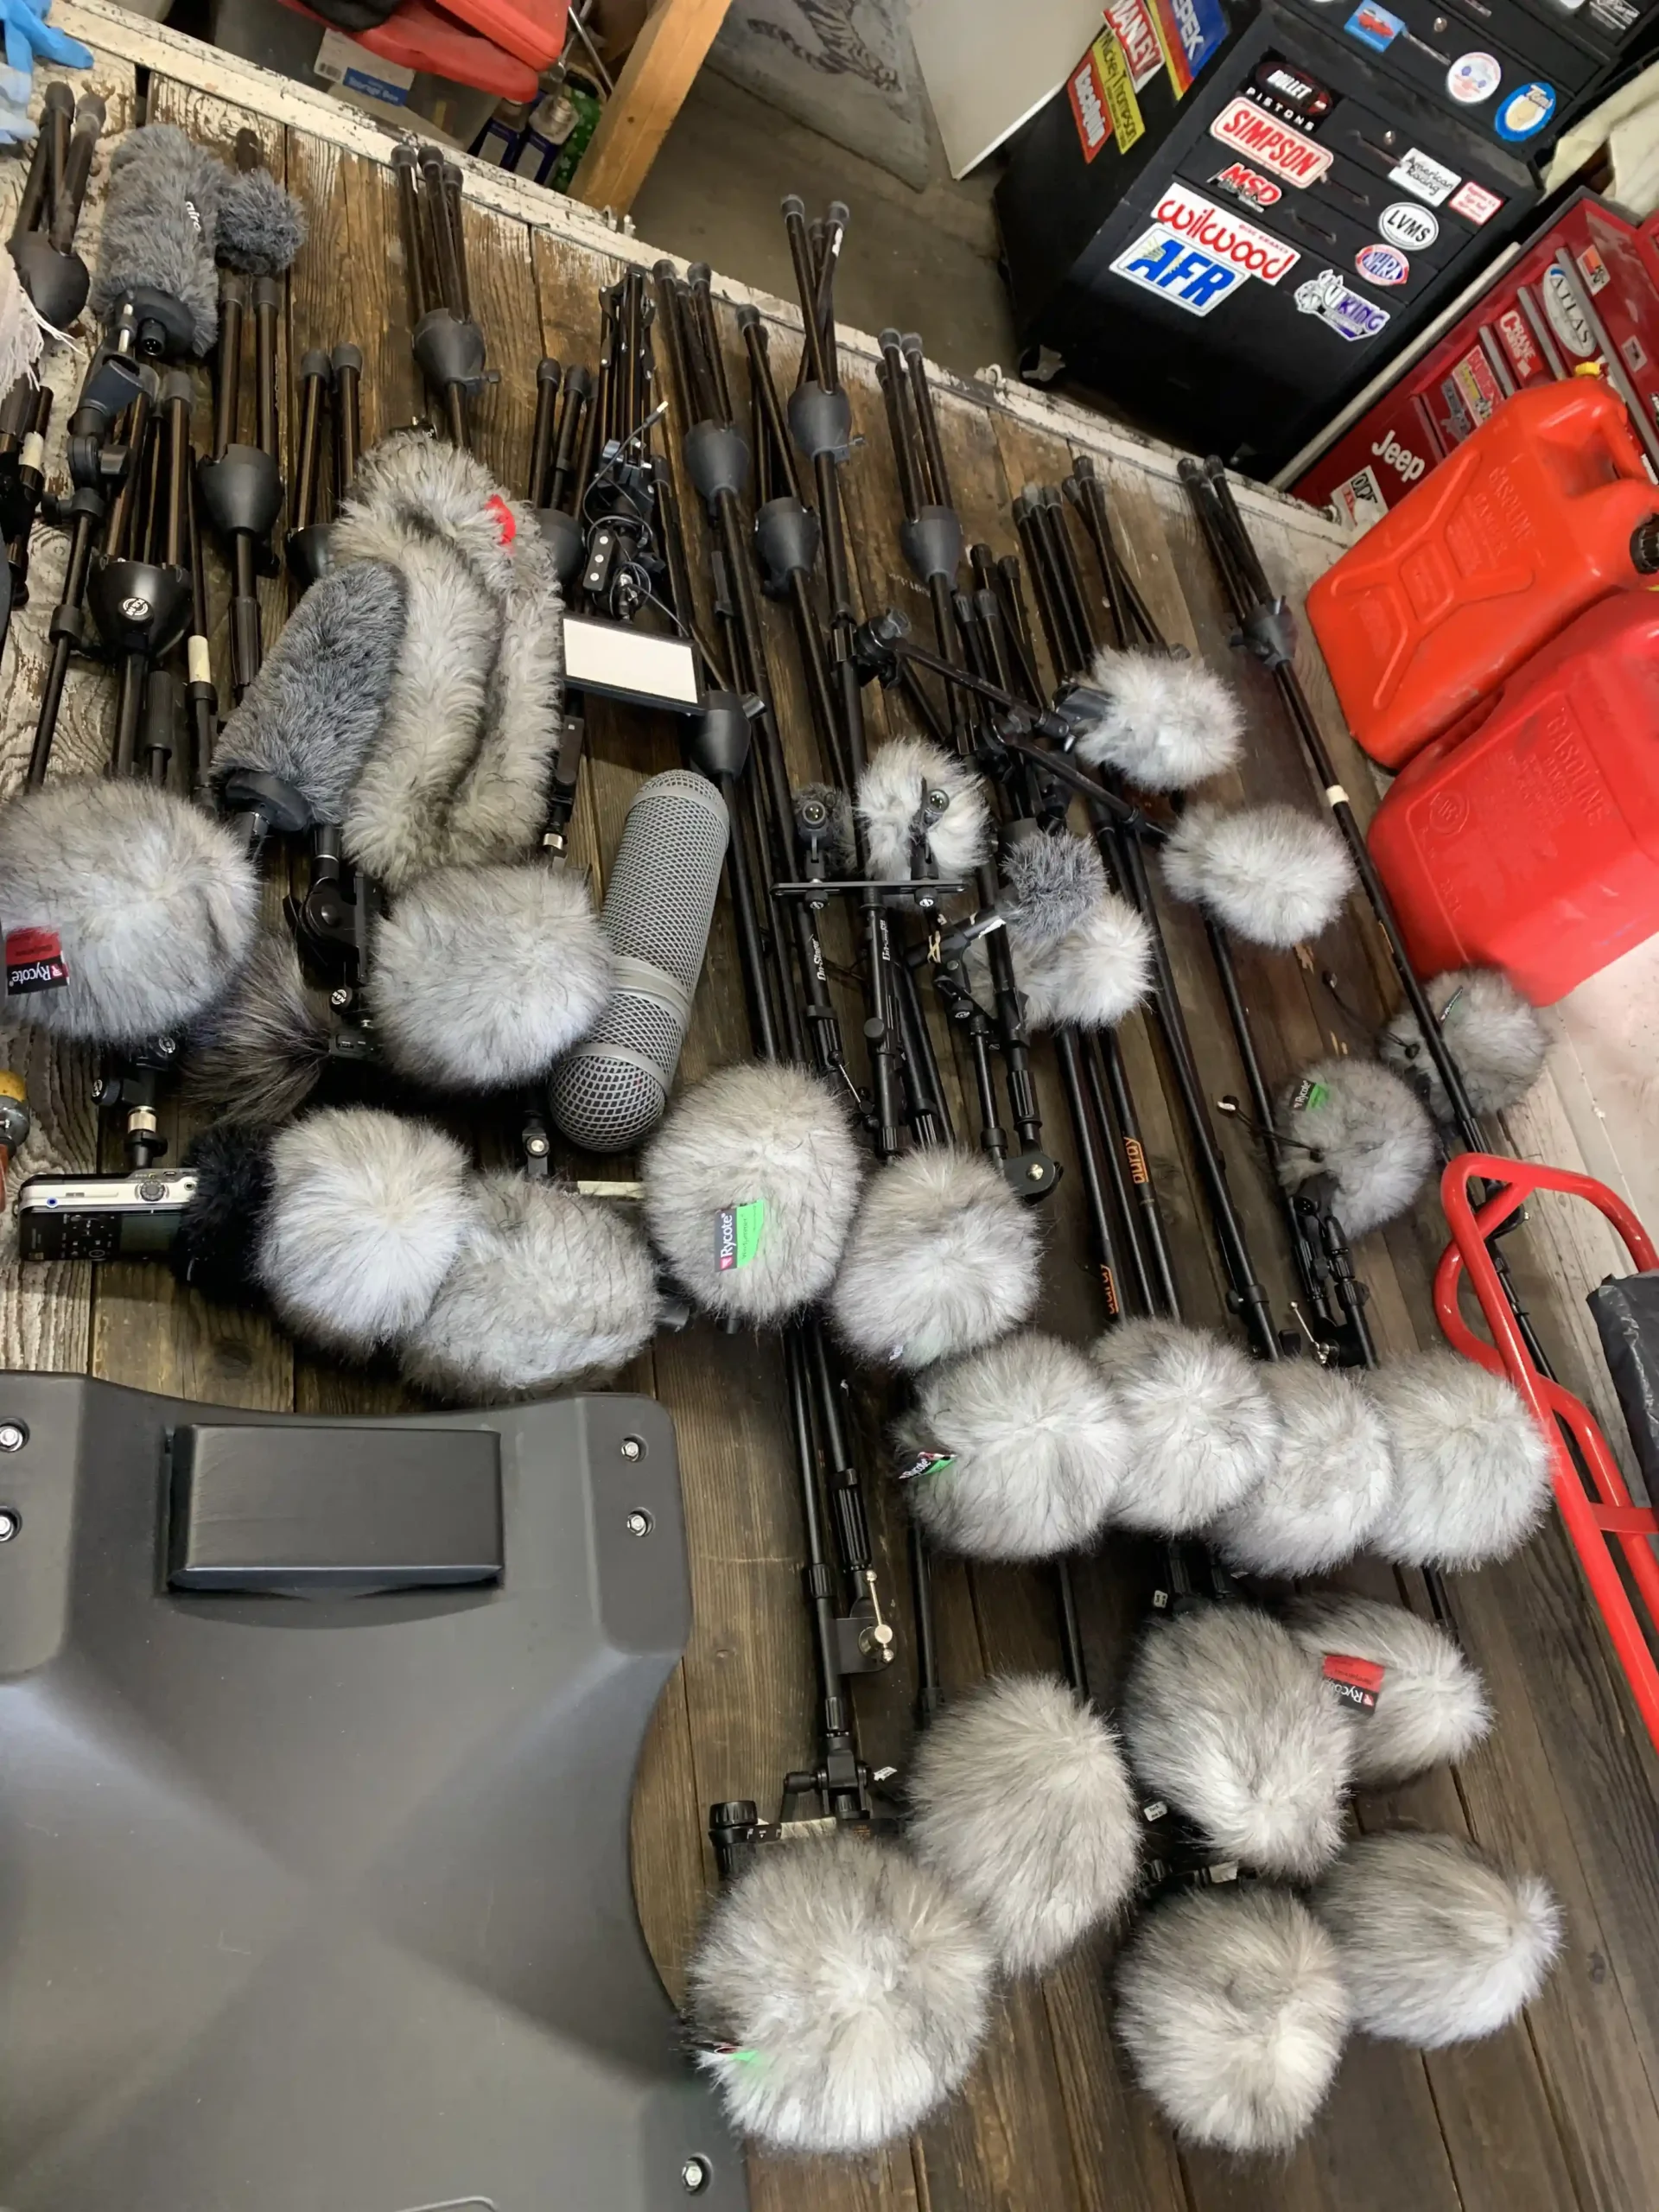
Microphones
When it comes to microphone selection, I’ve used a large array of microphones including shotguns, super-cardioids, lavaliers, cardioids, and omni-directional microphones.
Some microphones including the Neumann KMR81i mts & the Shure SM137s have an SPL switch which allowed us to place microphones closer to the firearm without risking damage
Understanding your microphones polar patterns will also allow you to get very close mic placements. I’ve been able to place a stereo pair of Neuamnn KMR81i mts just a few inches from the firearm by utilizing both the SPL Switch and angling the rejection ports towards the muzzle of the gun. I’ve have found when sampling shorter barrel firearms such as Pistols, SBRs (Short Barrel Rifles), & some SMGs (Sub Machine Guns) relying on the microphones rejection ports does not always work and can cause damage to the microphones, so I usually ended up swapping them out for a stereo pair of Shure SM137s which when paired with the Mix Pre 10ii have a max SPL of 169db compared to the Neuamans 138db.
Microphone list includes:
- Neumann KMR81i mt
- Sanken CO-100k (Foley Only)
- DPA 4062s
- Sennheiser MKH 8040s
- Sennheiser MKH 8050s
- Shure SM137
- AKG P170s (Distance Only)
Recording Different Firearm Layers
Recording Firearm Mechanical Layers
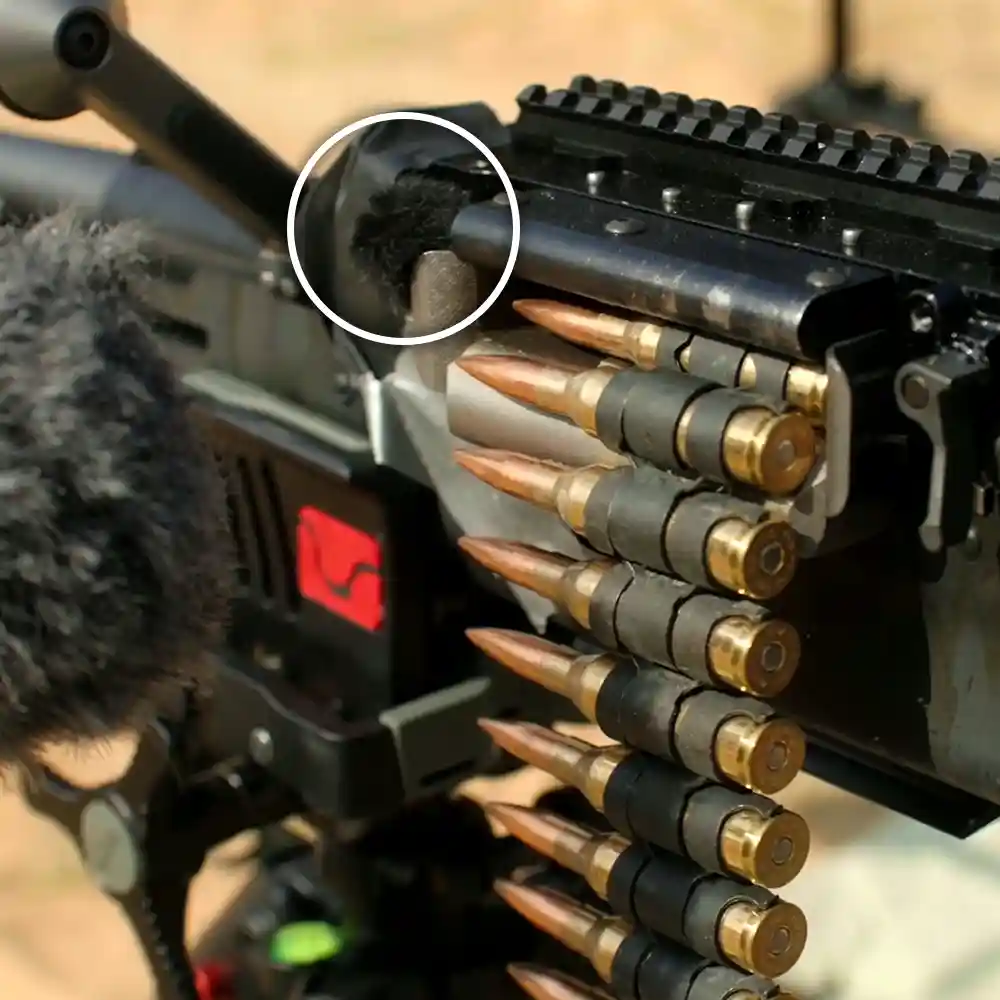
The mechanical layer is what gives the weapon roughly 70% of its unique sound signature, This layer consists of slightly different elements depending on weapon type—For rifles and submachine guns, the mechanical layer consists of the bolt carrier, the resonance between the bolt carrier and the material of the receiver, the magazine follower emptying rounds, and the reciprocating charging handle if it has one. For pistols, the mechanical layer is simply the action of the slide moving back and forth. For belt-fed machine guns, the mechanical layer is the bolt carrier and the belt interacting with the feed tray as rounds feed. These mechanical actions give each firearm its unique characteristics.
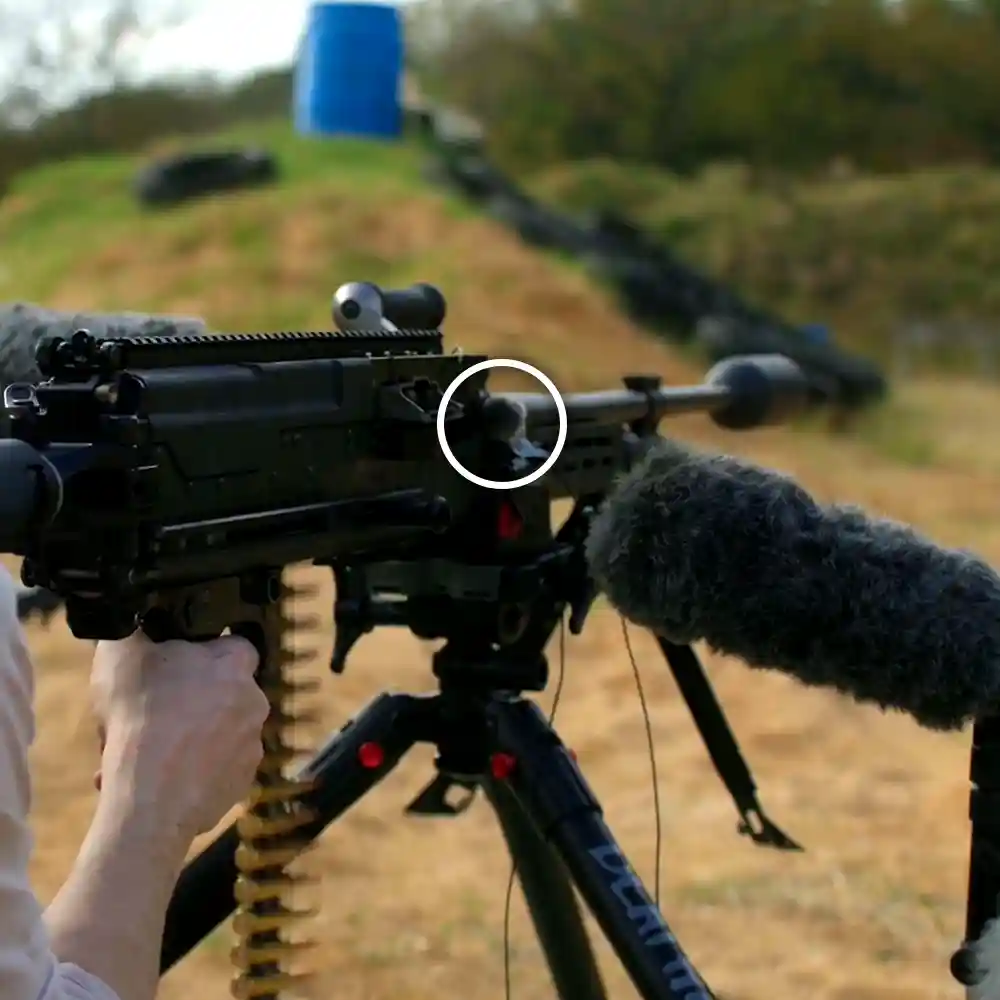
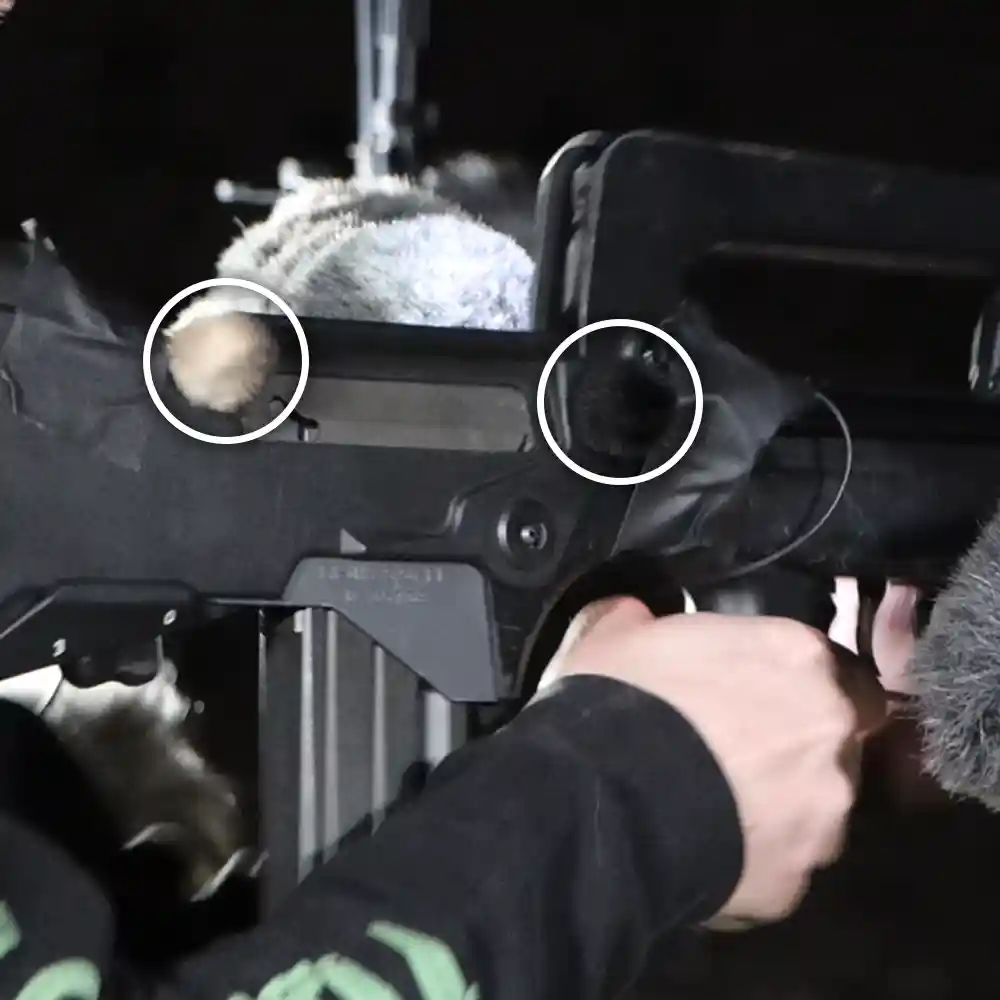
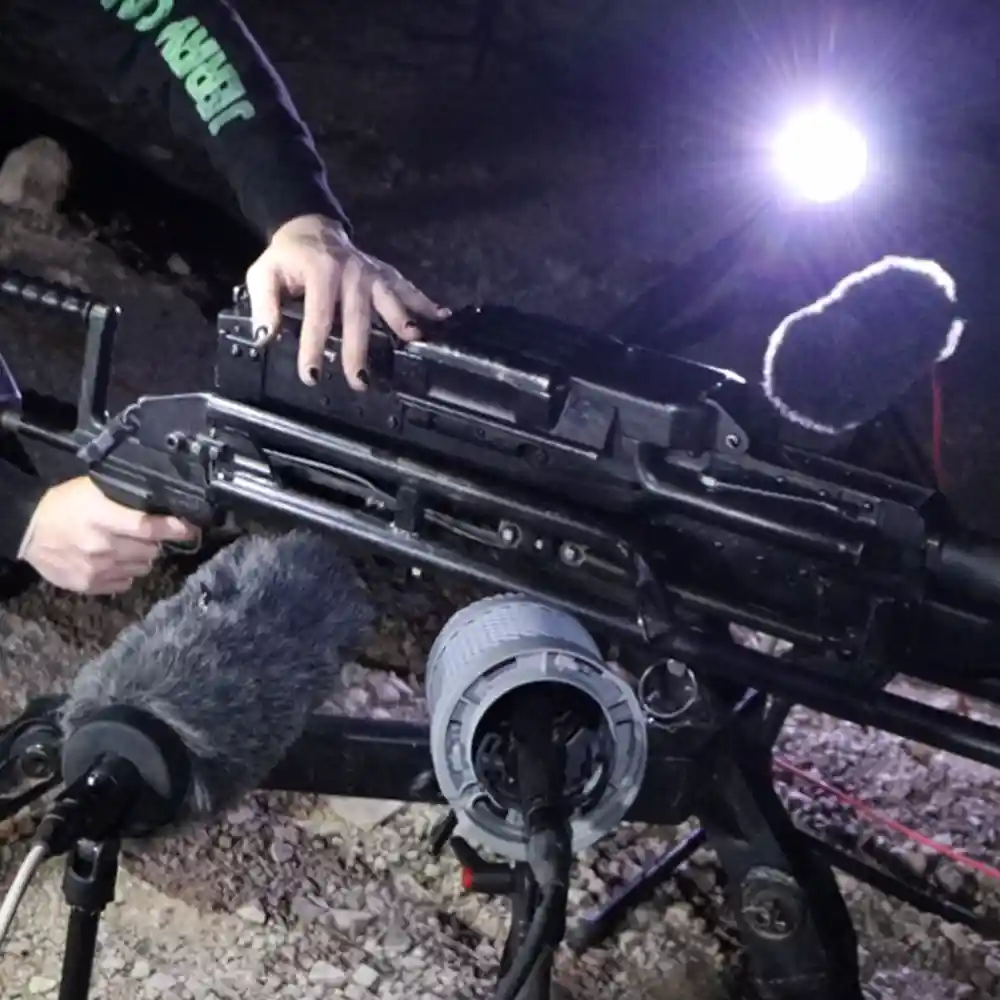
I capture the mechanical layer by recording at a distance of 6 to 8 inches from the ejection port using a stereo set of supercardioid microphones (Neumann KMR81i mts), which I call unattached mech. Starting in 2024 we are now also using two mono lavalier microphones (DPA 4062s) which are placed directly on the ejection port, which I called attached mech. These two approaches produce distinctly different flavors of the mechanical layer. At 6 to 8 inches, the sound is more aggressive and warm, and I personally prefer it. In contrast, the lavaliers on the ejection port better isolate and capture the bolt carrier with extreme presence.
I also made a discovery during post-production while listening back to burst and full-auto recordings: the mech microphones also captures the subtle sound of the magazine follower as the bullets are expended. This discovery was very noticeable when recording suppressed burst and full-auto shots, where the mechanical layer shifts from its sharp, aggressive tone to a softer, more subtle character.
Attached Mech
Unattached Mech
We’ve found adding a suppressor to the firearm dramatically changes the character of both the attached and unattached mech microphones.
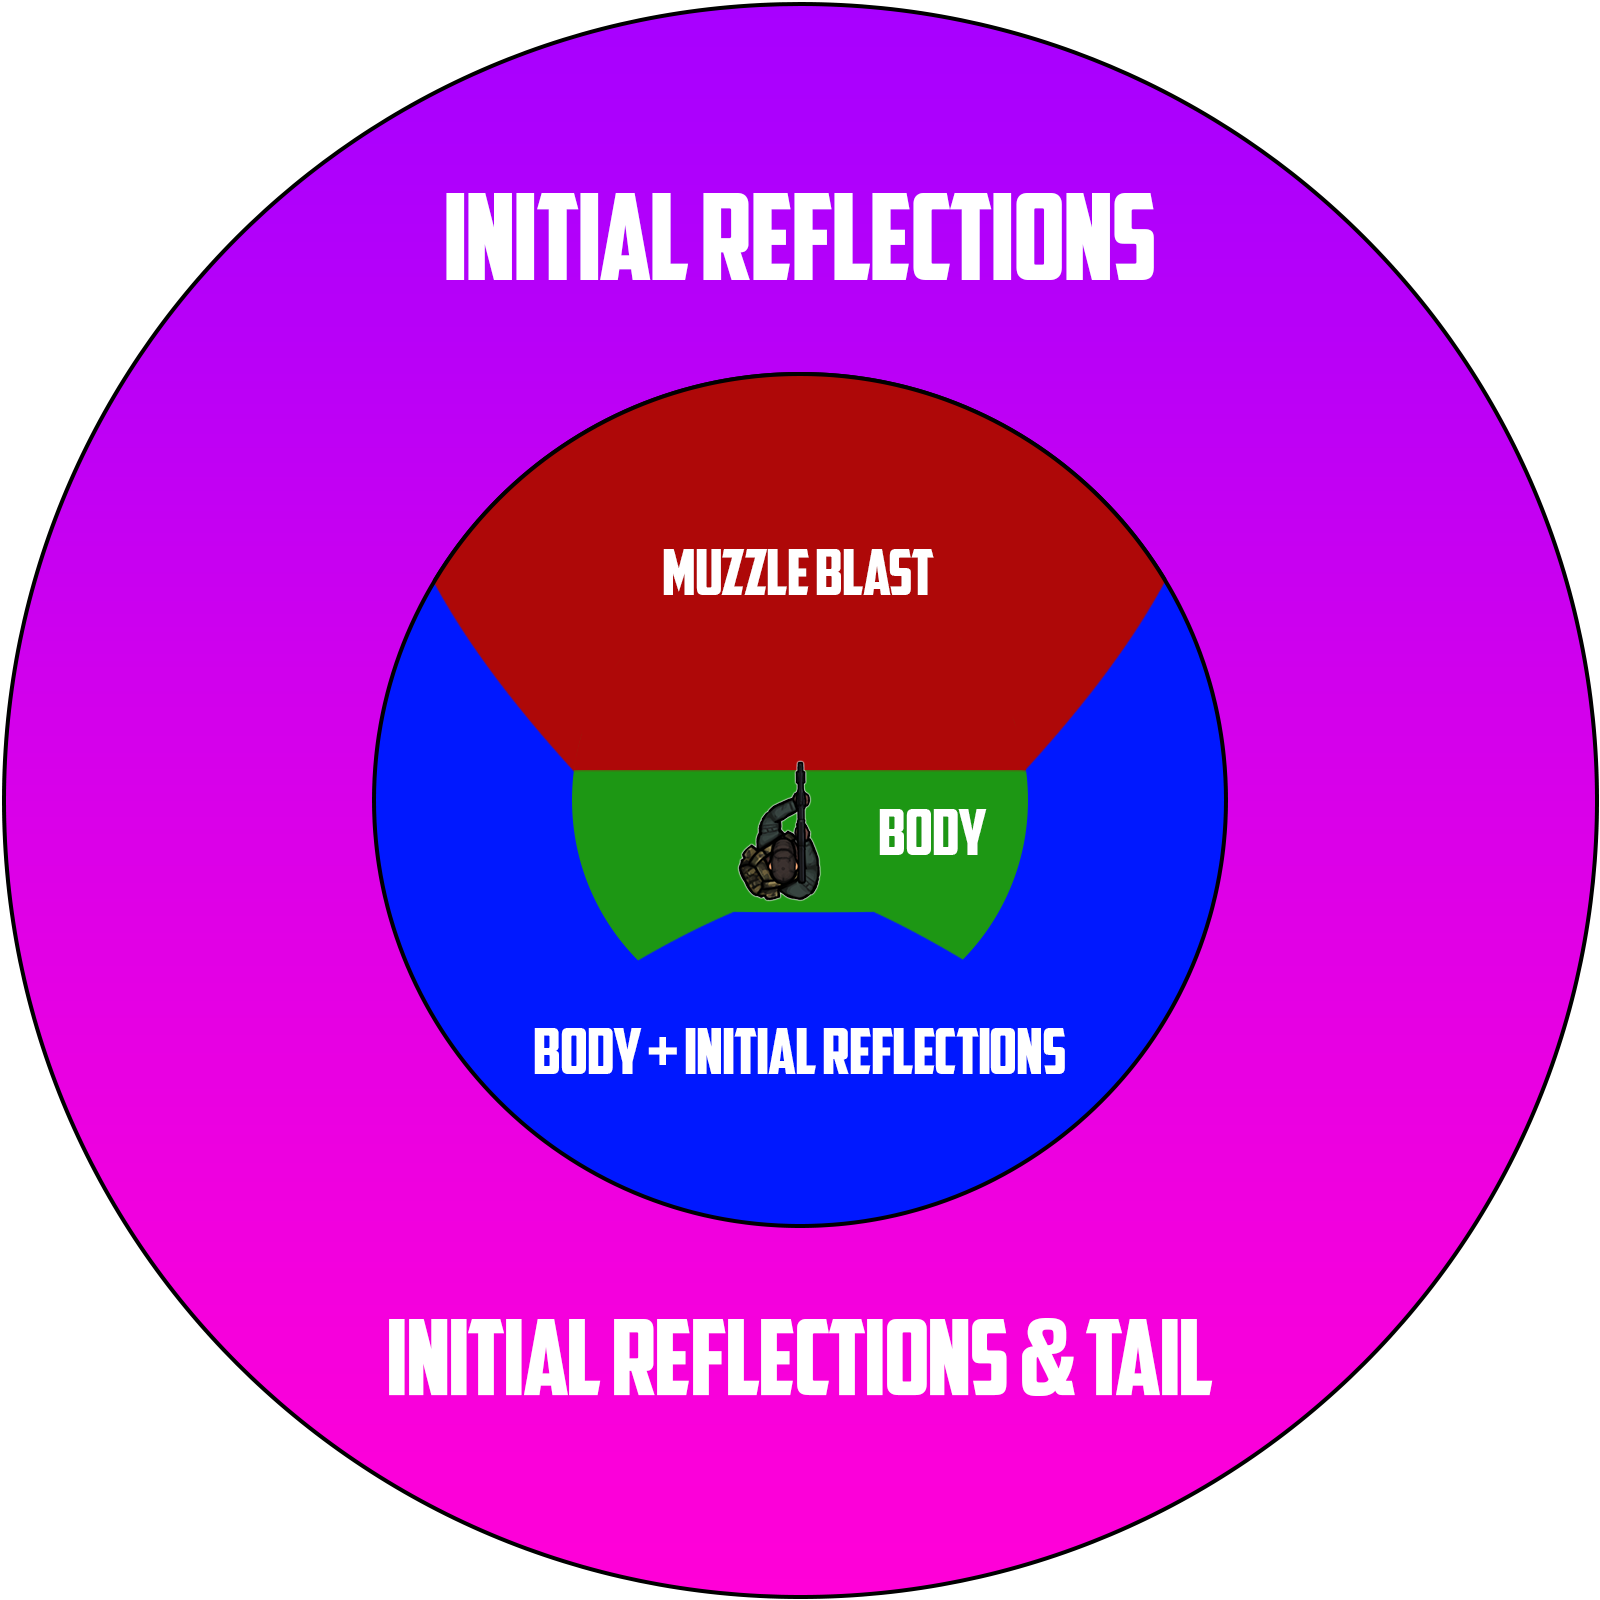
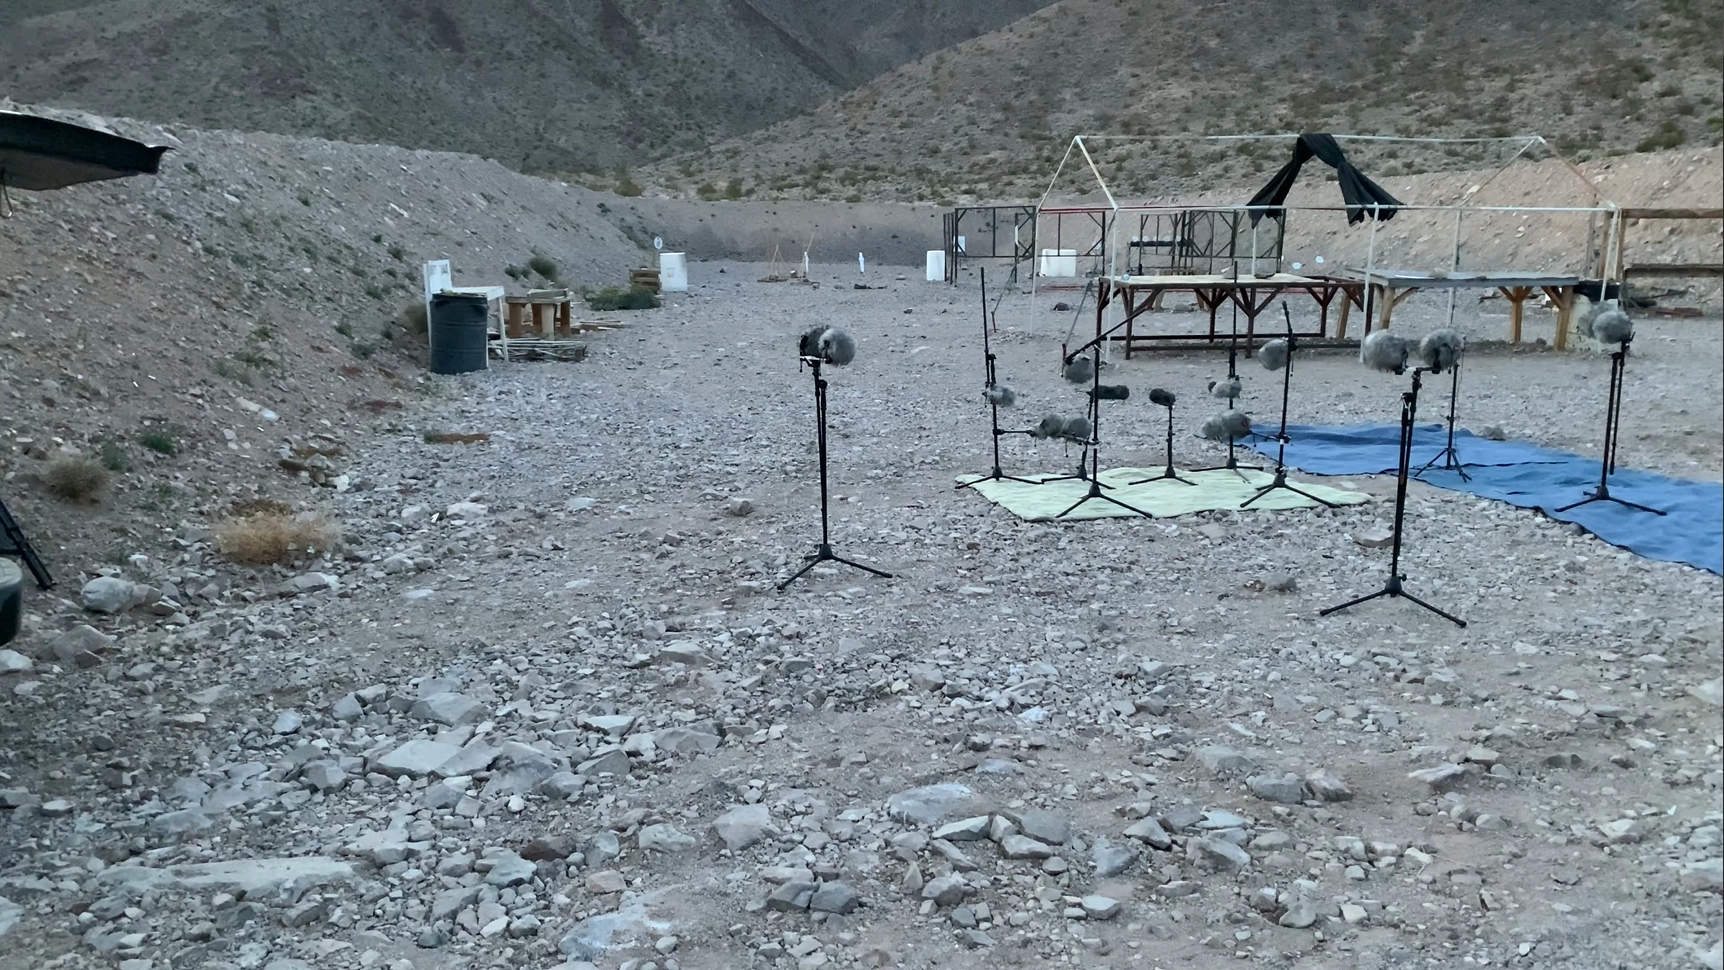
This diagram of the area around the shooter represents where the 3 sub-layers of the shot layer reside.
Recording Firearm Shot Layers
The shot layer is what makes up the other 30% of the uniqueness of the firearm you’re recording. I’ve found this layer is a blend of three 3 sub-layers:
- The distant mechanical resonance of the weapon “body” (3-12ft)
- Muzzle blast (weapon dependent)
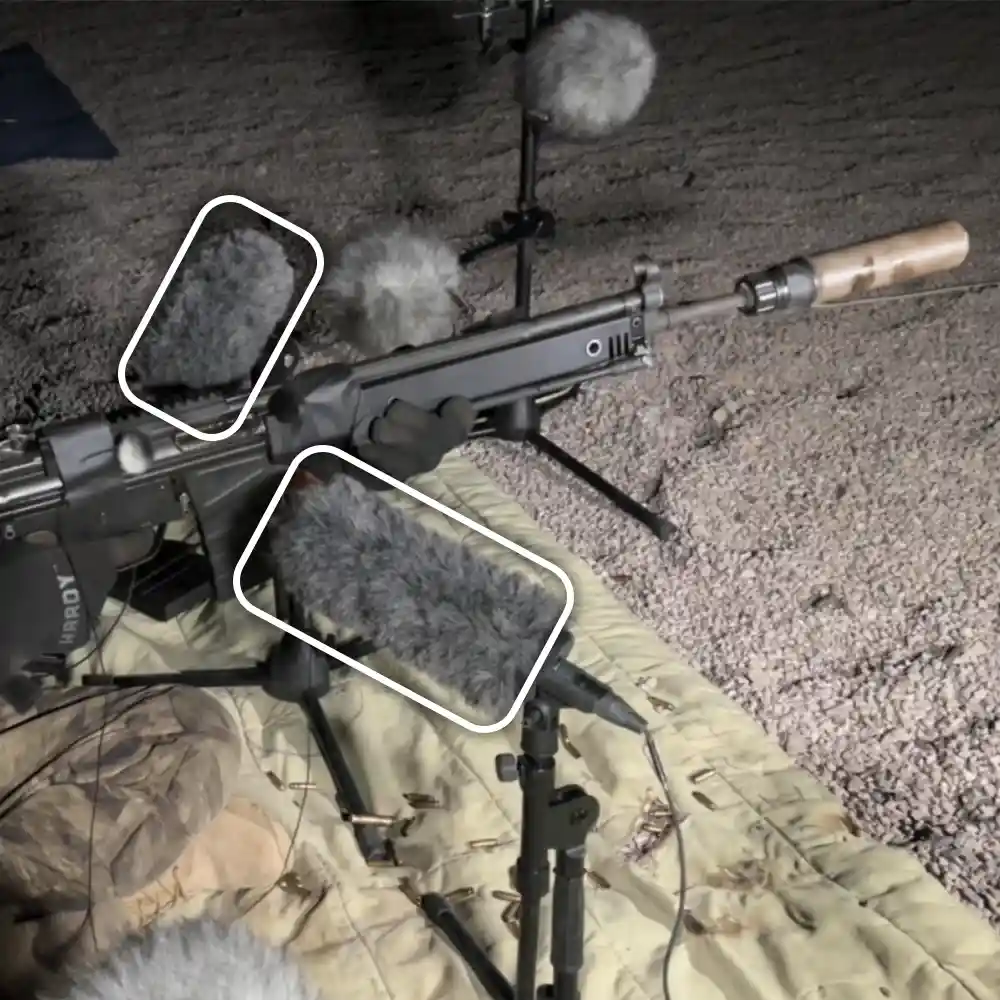
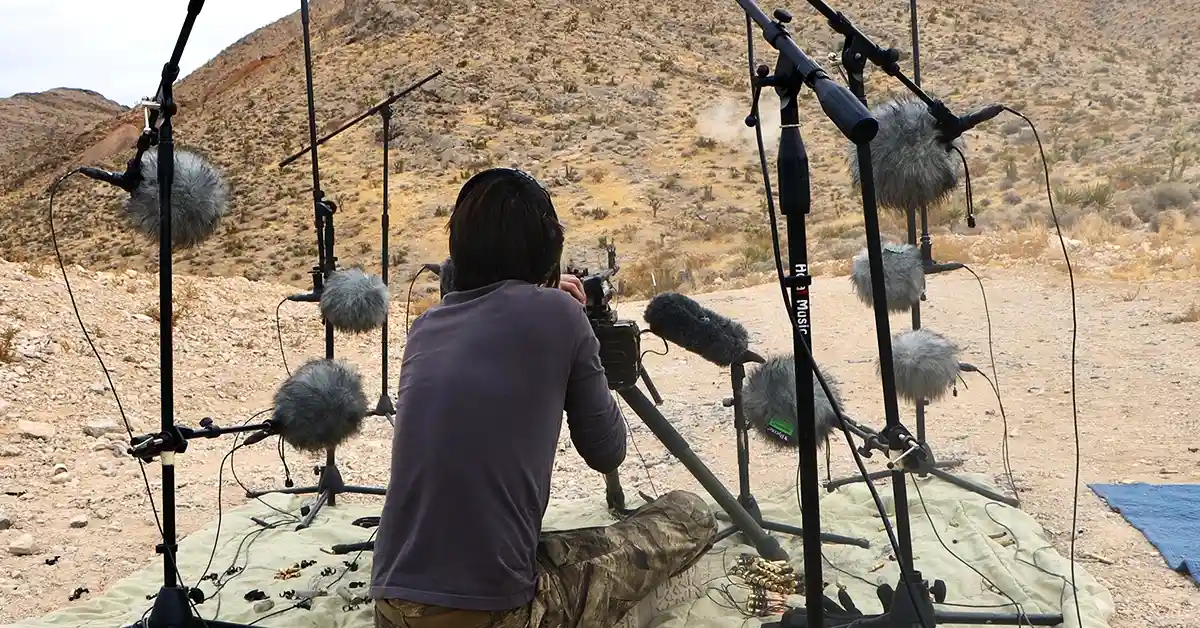
These layers reside between the 3 to 24ft range and will depend on microphone angle and distance. Note that the muzzle blast area will shrink or grow depending on caliber of the weapon recorded. My personal favorite microphone positions to capture the shot layer are: 3ft to the side of the shooter for a strong “body” sound that represents the overall sound signature, 8ft spaced-pair which is placed both back-right and back-left of the shooter for a full and balanced sound – think of this perspective as “overhead” mics to a drum kit; grabbing a nice balanced full-image of the weapon, and 20ft to the side of the shooter for a detailed capture of the initial reflections while still retaining some of the weapon’s unique character.
Firearm Barrel Lengths
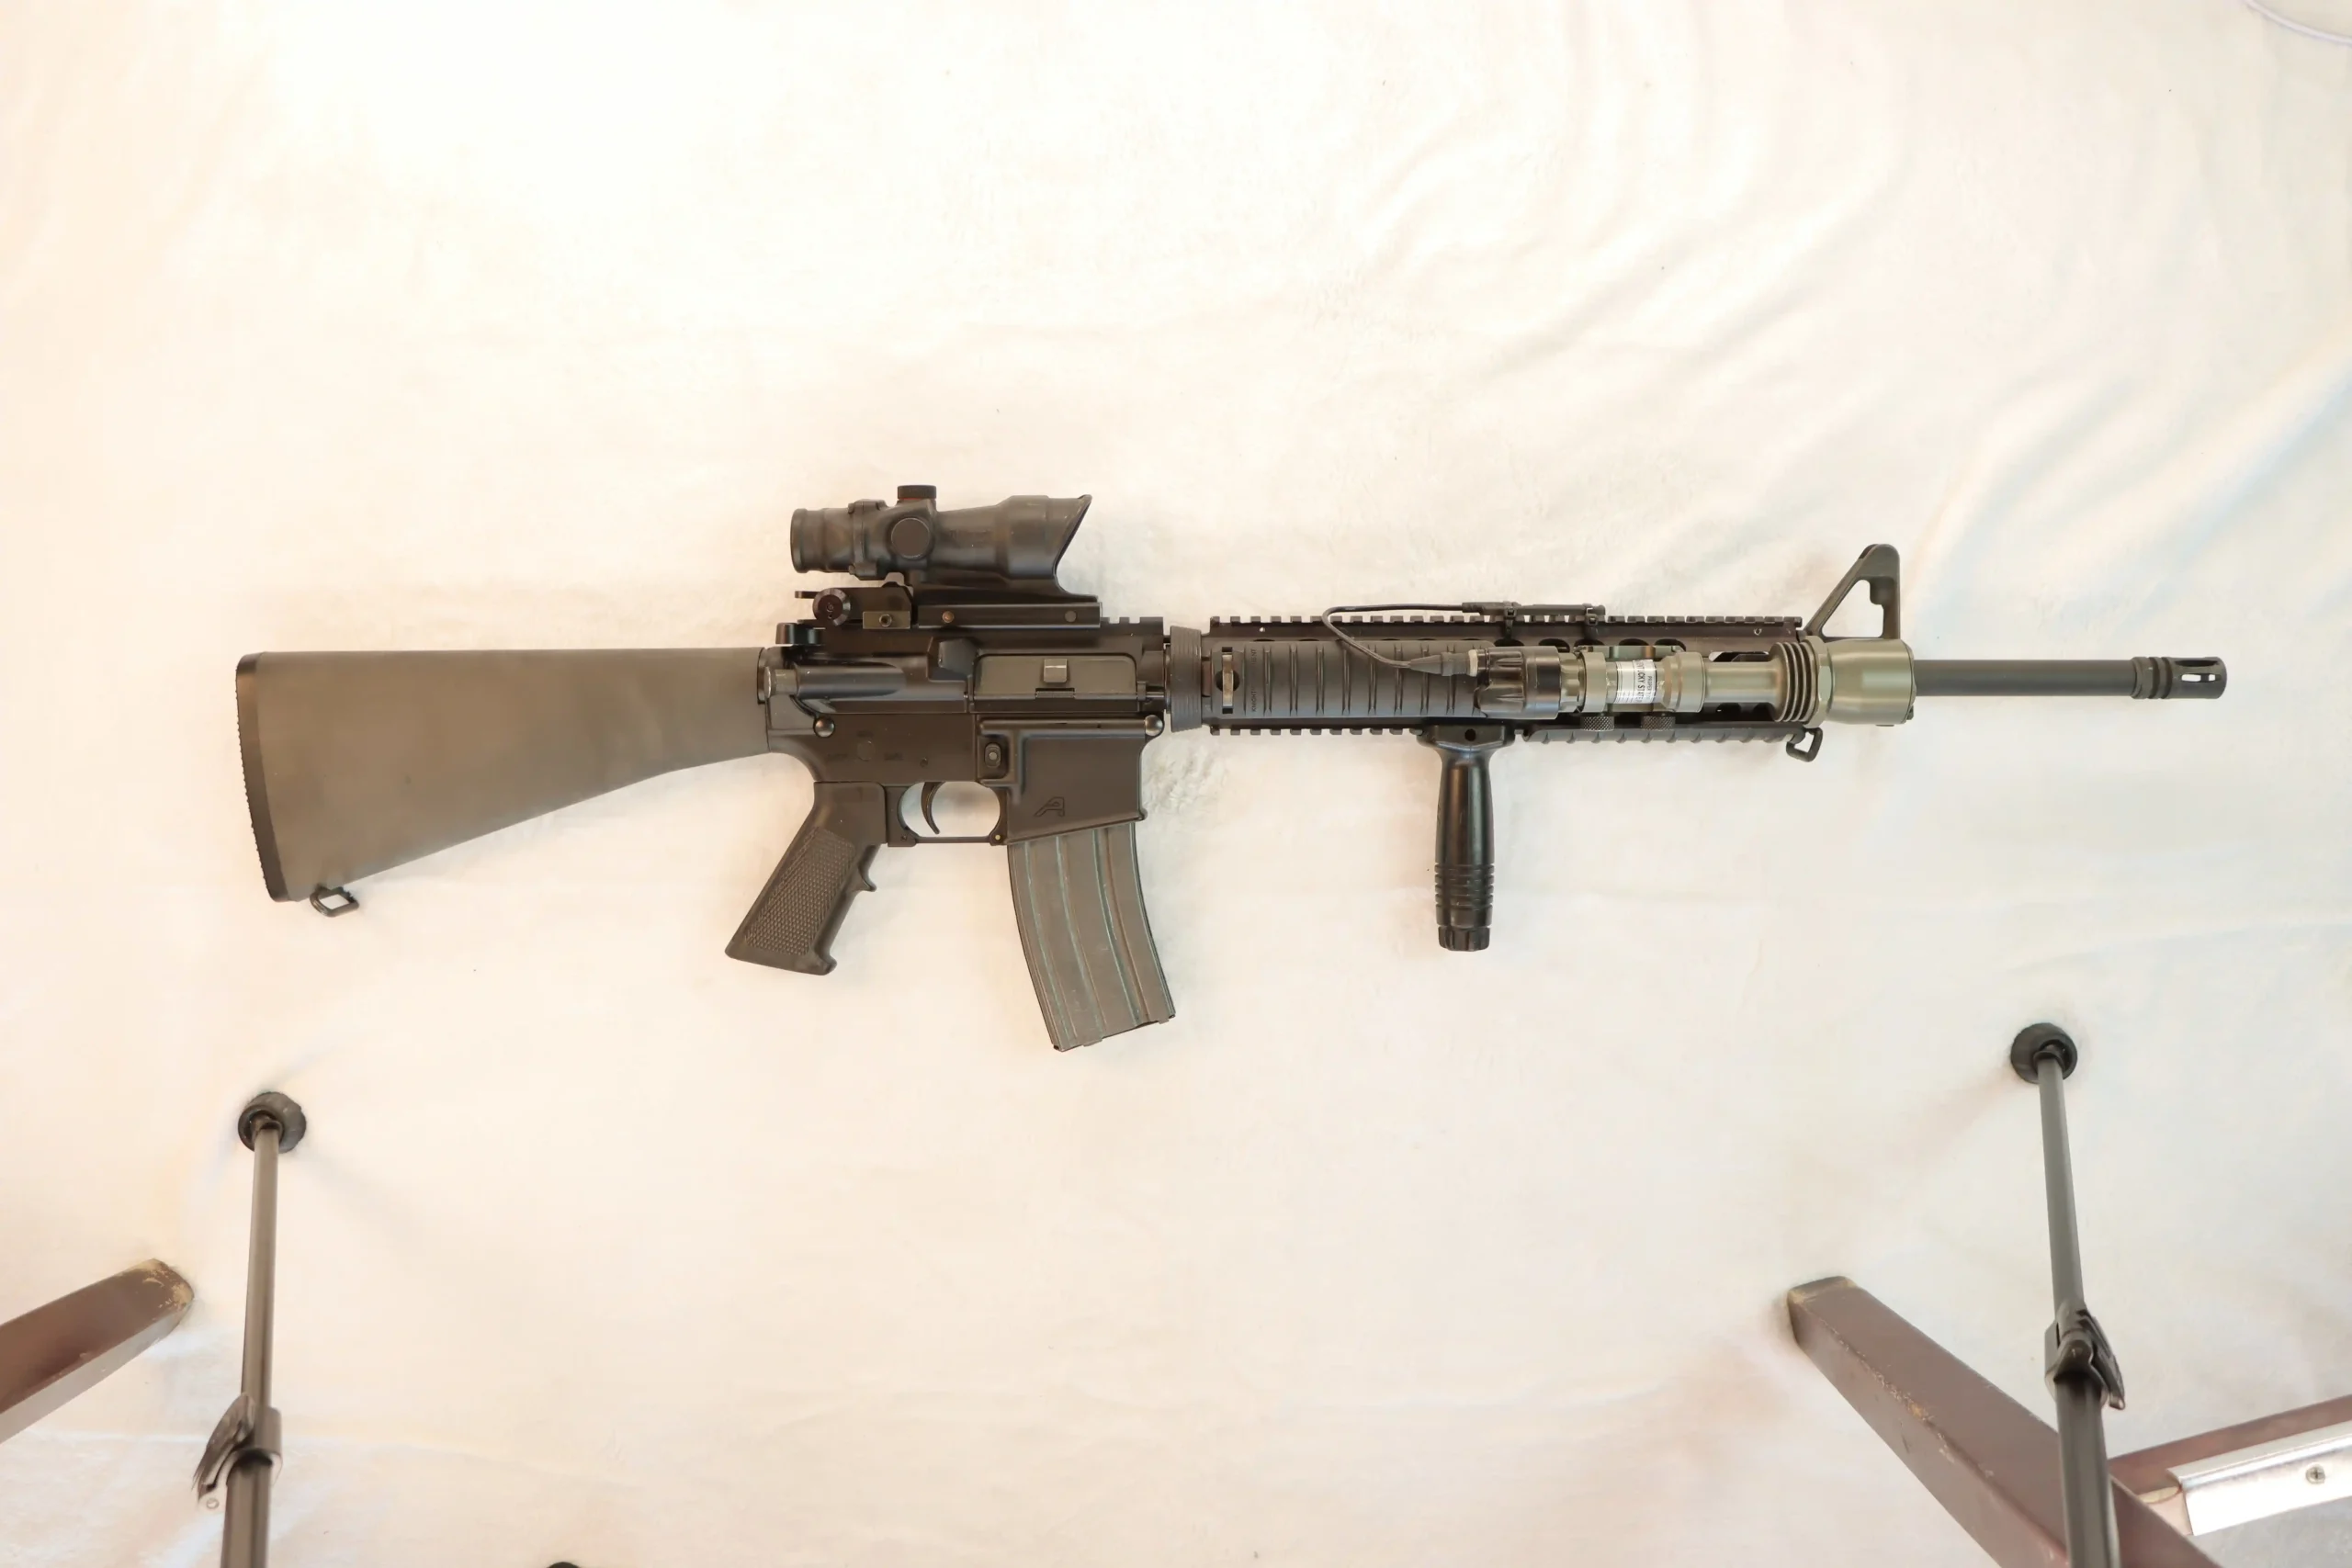
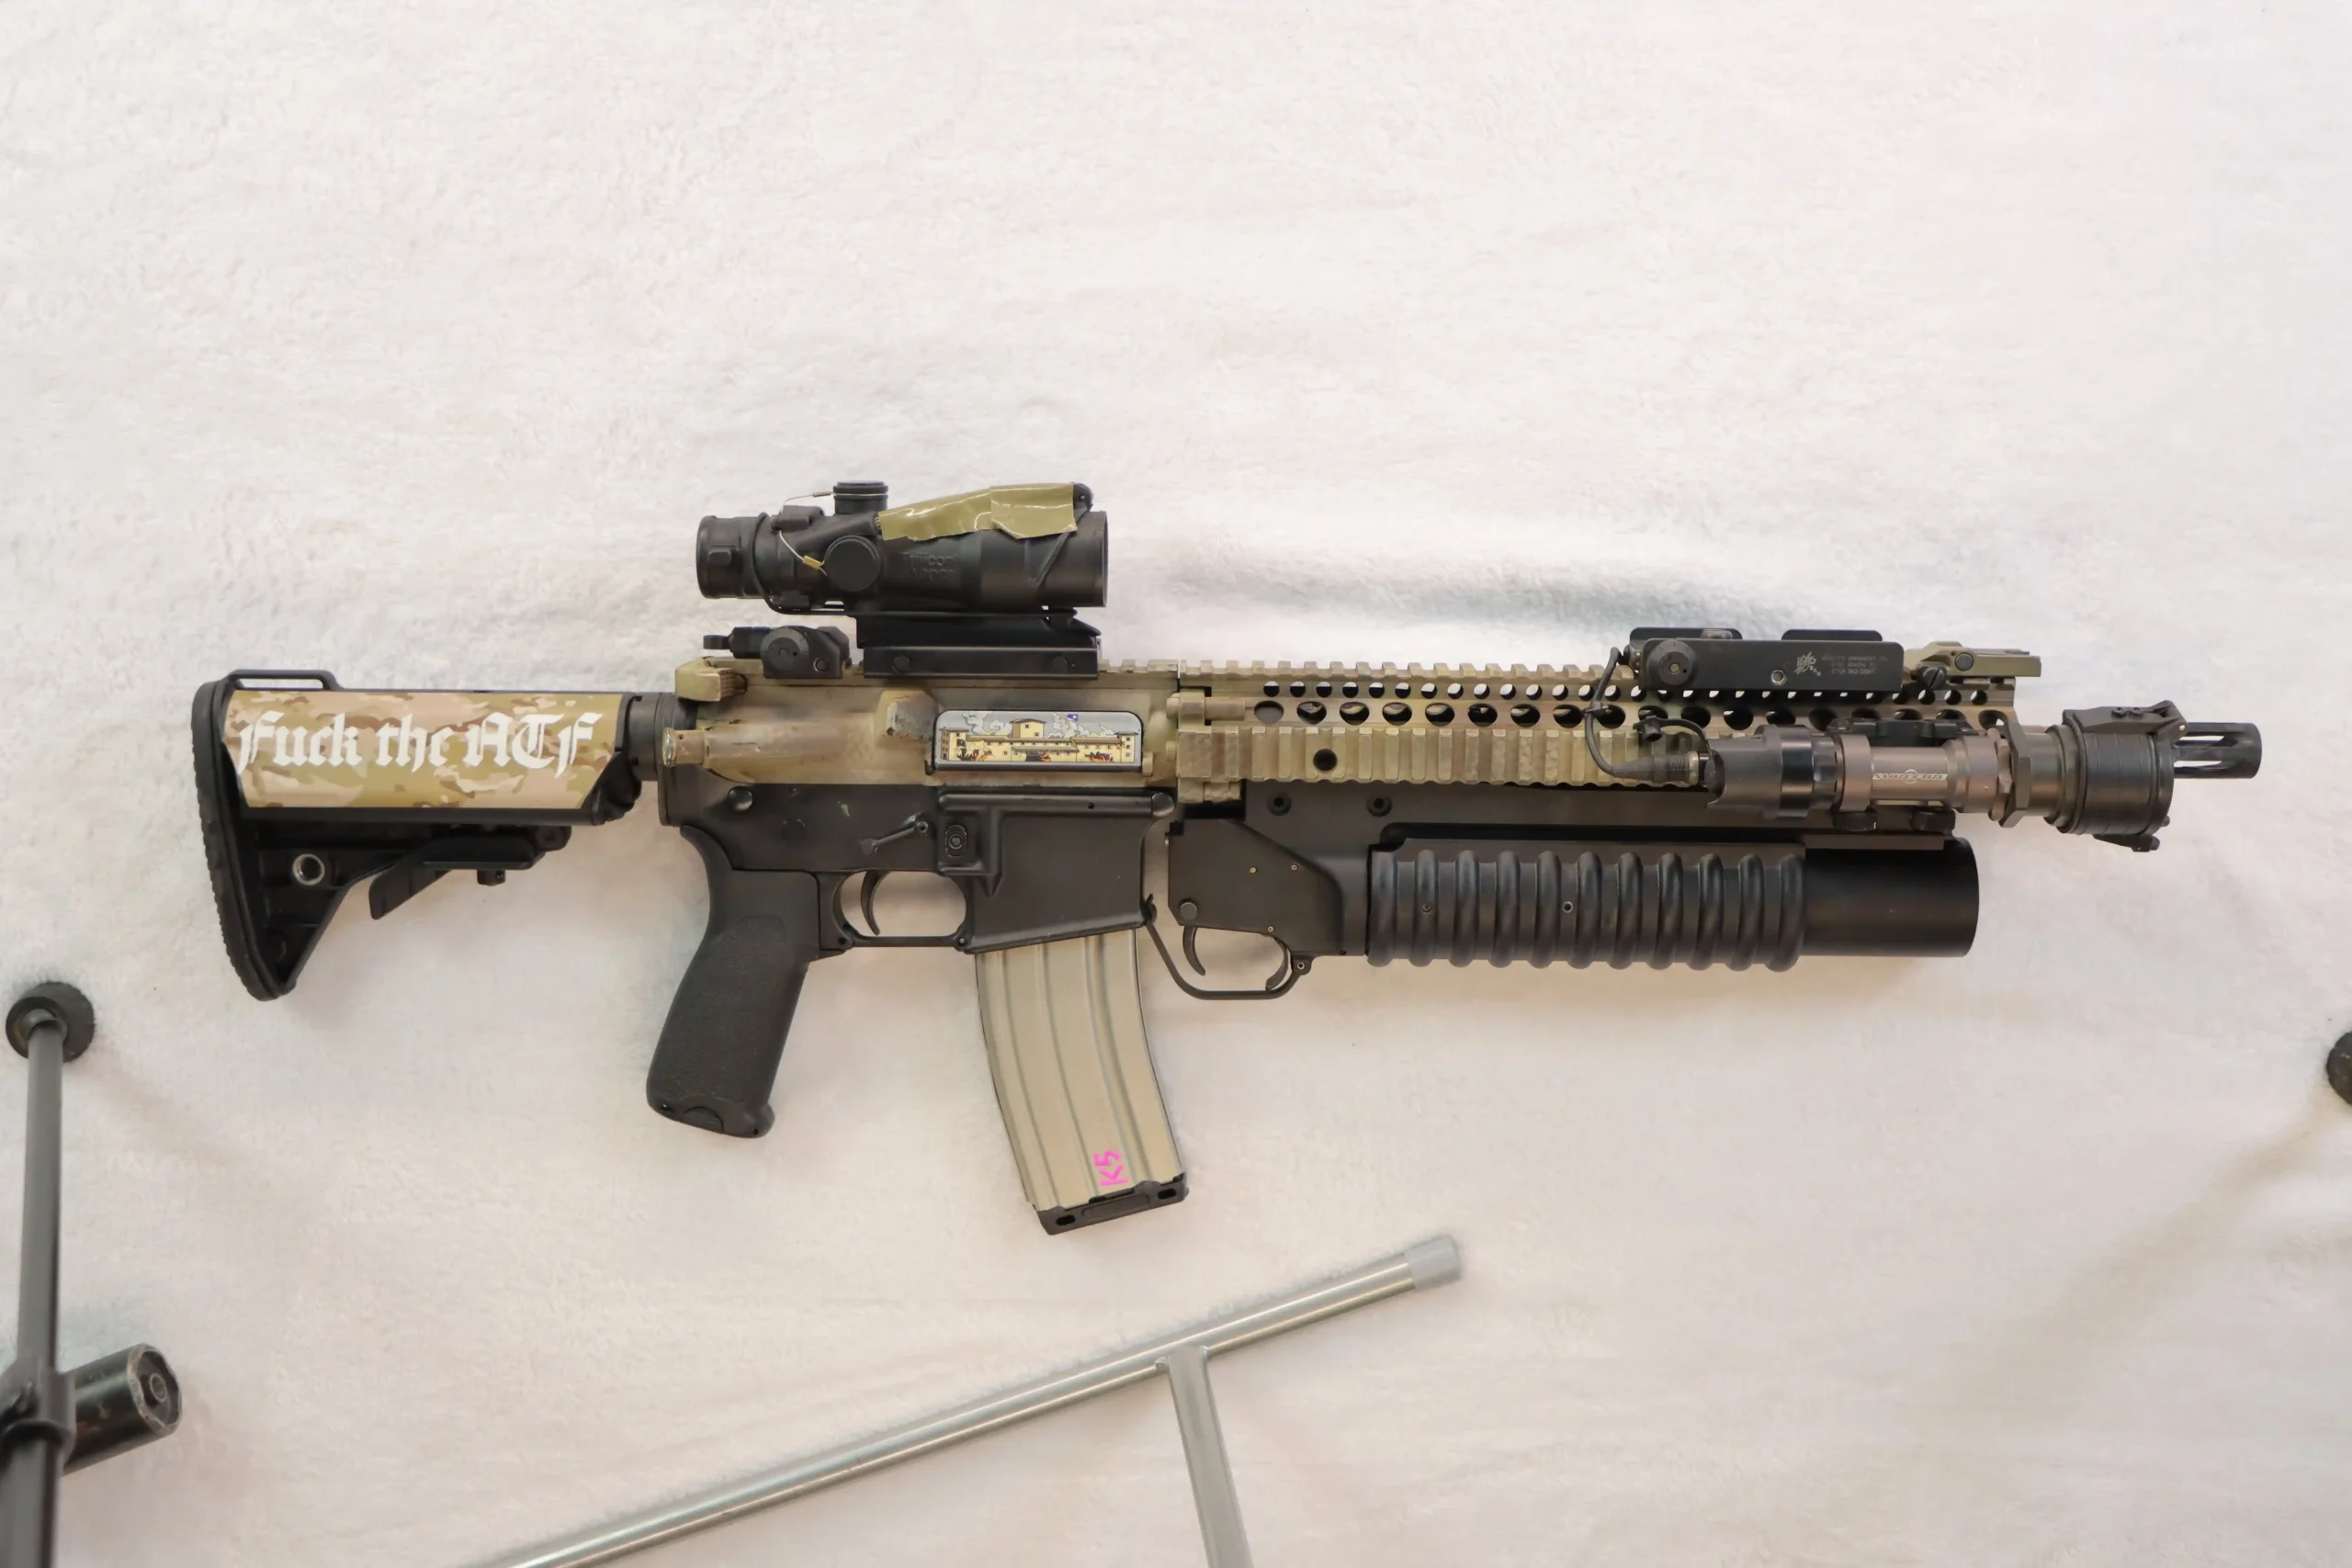
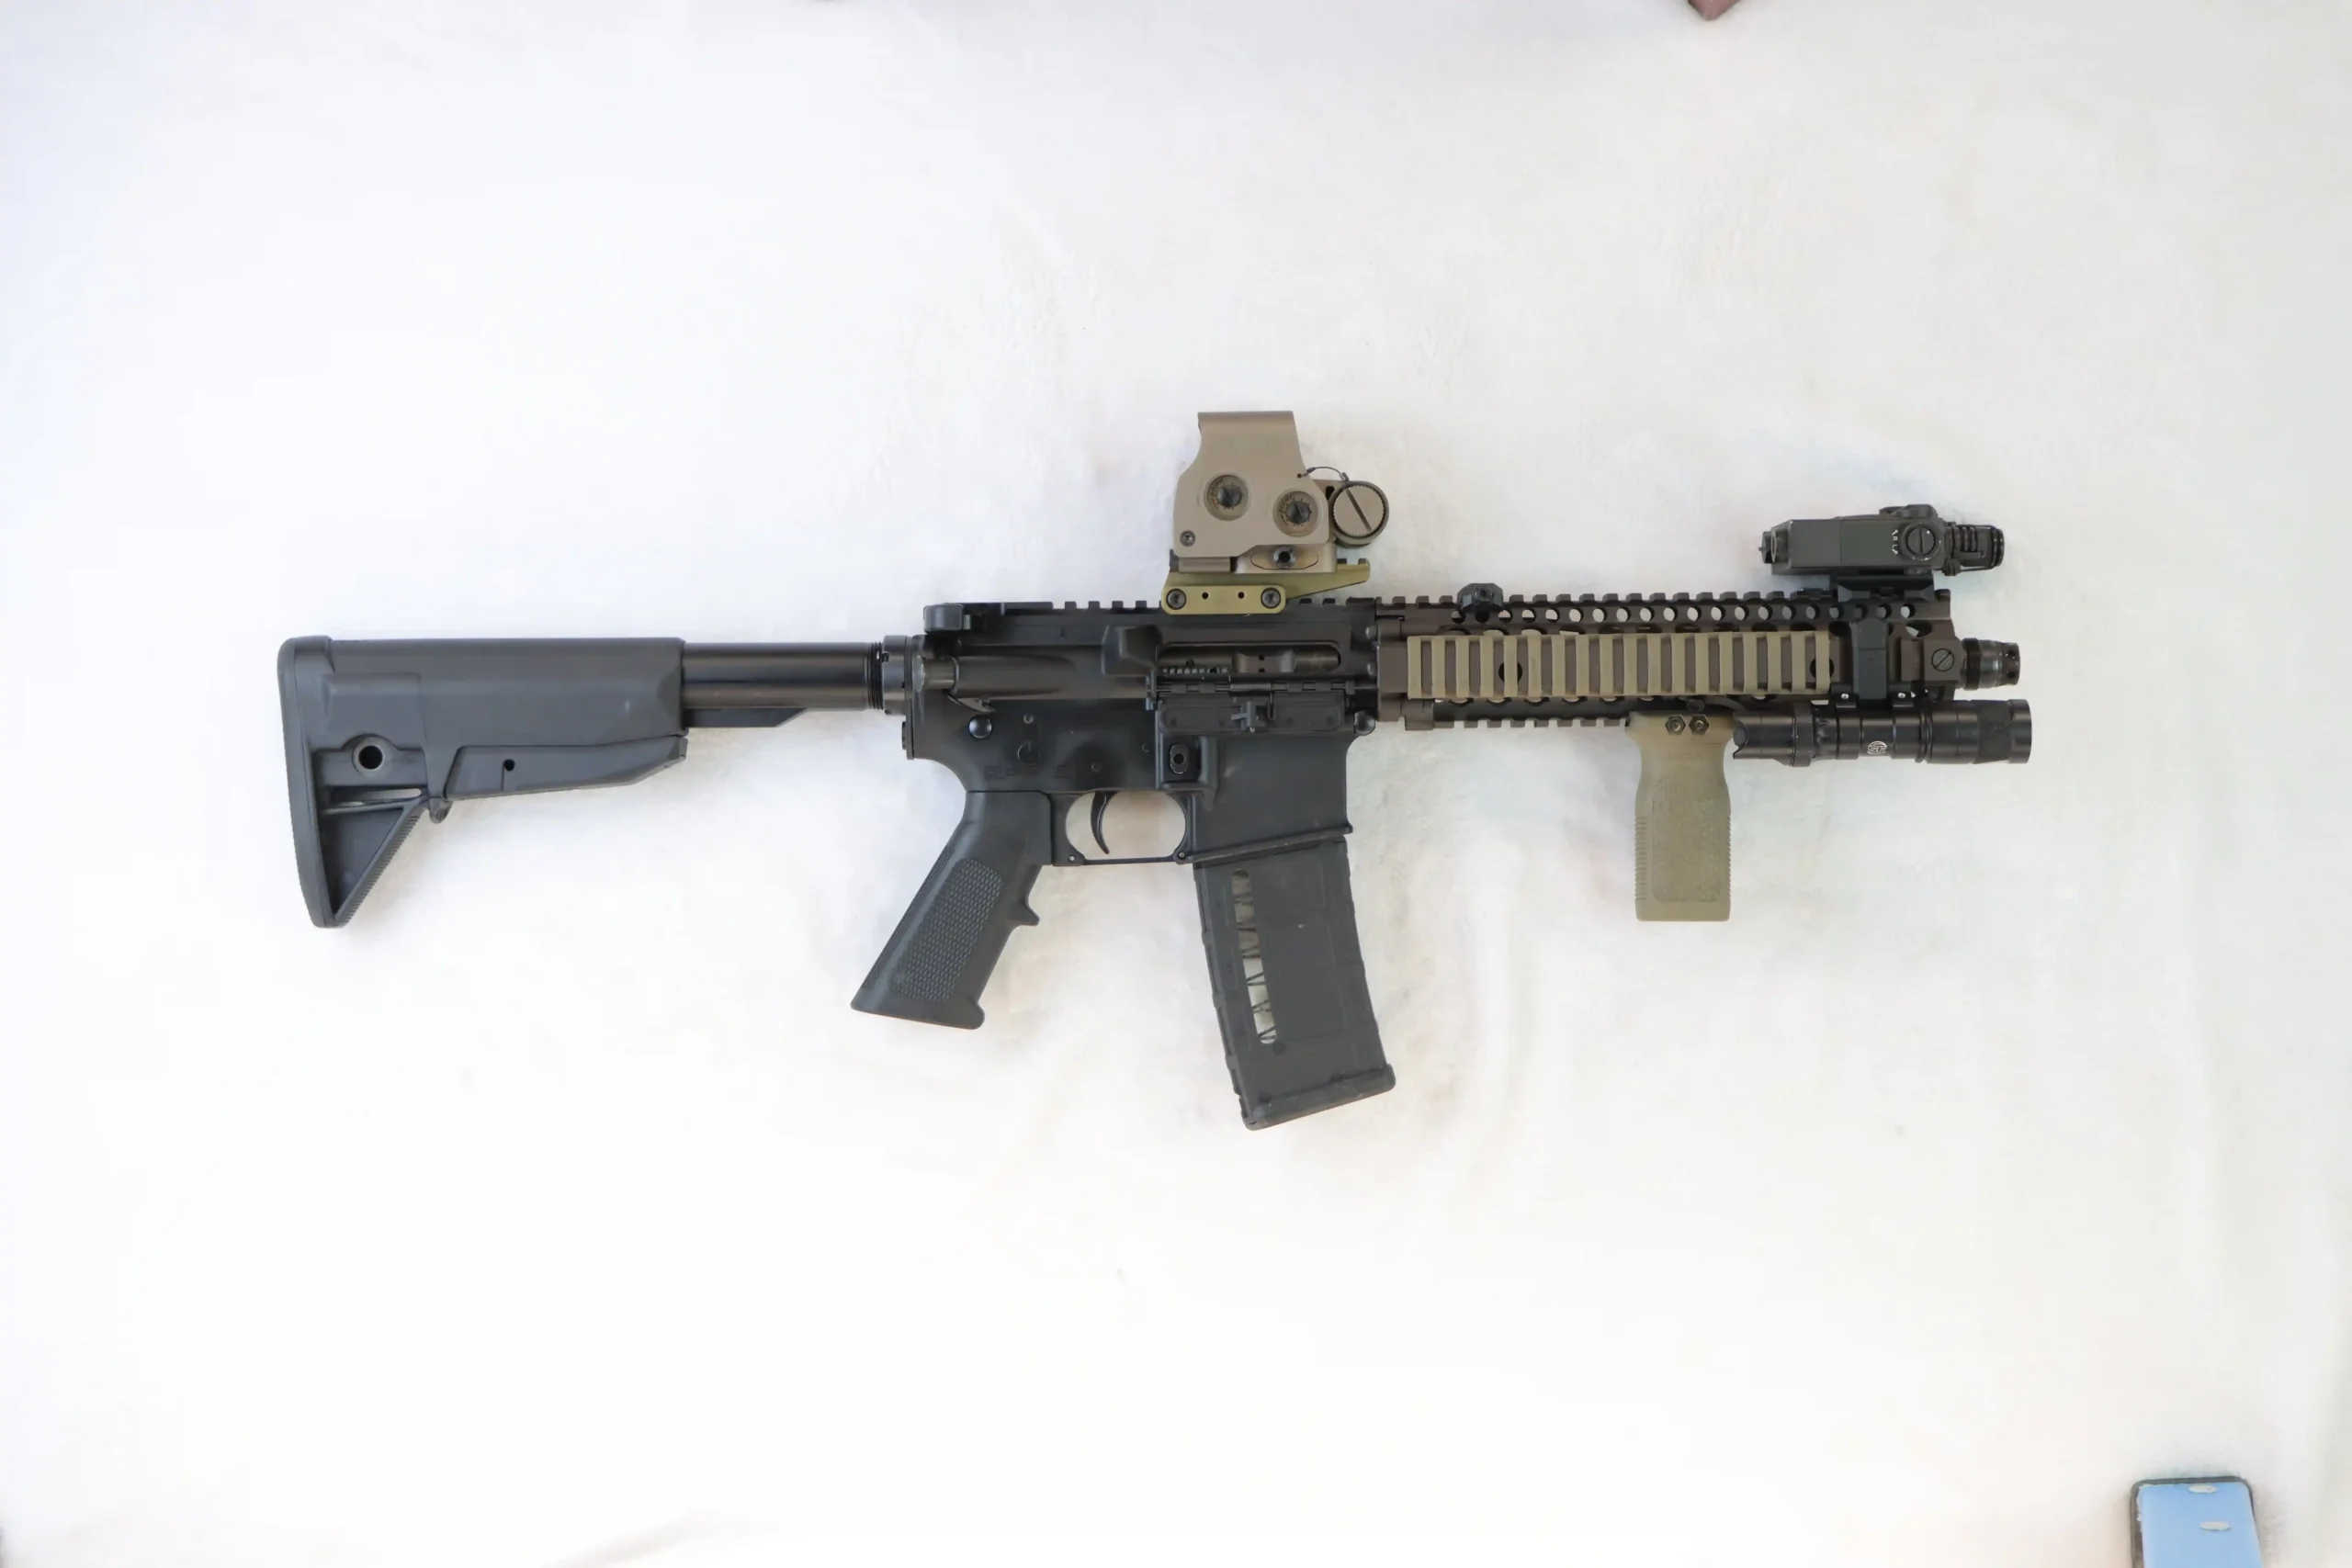
The shot layer and initial reflections layer are also influenced by the barrel length of the weapon you’re recording. For example, you can record three AR-15 pattern rifles from the same manufacturer with three different barrel lengths and get three slightly different shot layer and initial reflection impulses out of them. Roughly every 3-4 inches of barrel length change alters the shot sound of the weapon. The shorter the barrel, the more boomy and deep the firearm will sound; the longer the barrel, the more the low end gets muffled. This change is most notable when comparing the sound of the M16, M4A1, and MK18.
– The Shot files have been processed, they are louder than our previous examples –
These audio files are composite mixes highlighting the shot layer differences. These firearms were recorded on the same night using the same recording setup and ran through the same processing chain.
Recording Firearm Initial Reflections
The initial reflections are what the blast resonates with in the immediate area around the shooter. It shapes the character of the blast and can change the way the shot layer sounds when mixed, providing a context for how big or small the weapon caliber is. This layer typically resides in the range of 20 to 500 milliseconds and is most easily captured within the 8 to 50-foot range. It is very important to record in an open environment so that this layer is not tainted with unwanted reflections that alter the sound.
Recording Environment Tail Layer
If it is your goal to isolate the firearm from the environment, It’s important to record in open spaces, away from walls or indoors, to preserve the unique sound of the weapon and avoid unwanted reflections or dilution of their character. Open fields, open desert, and desert areas with hills are the three best environments to record firearms with minimal external influence, because they provide the most generic weapon reflections that have minimal impact on the character of the weapon.
Recording in open spaces also allows for easier implementation of dynamic tail systems in game engines. A generic-sounding tail — or no long reflections at all — gives a sound designer a clean foundation to layer environmental tails without fighting baked-in ambience.
For example, if you record a gun in a forest, the initial reflections and tail layer will be coated with crackling trees and dense environmental textures. This becomes a problem when trying to sculpt a clean weapon sound that can function across multiple dynamic environments in a video game.
Recording Firearm Foley
Preforming Firearm Actions

When I first started recording foley five years ago, I did not know how to operate any of the weapons, so I left it to the range safety officers to do the foley for me as I told them what I needed and how I needed it. One day, while recording foley for an AK, the range safety officer asked me if I needed something called a “chamber check”. (A chamber check is the action of pulling the charging handle back half way to check if there is a live round in the chamber.) I didn’t know what that was at the time, and he referenced the game “Escape from Tarkov”. He showed me what it was, and I was like, “Oh my God, absolutely.” So, from then on, once I had started the Master Gun Armory project and knew how to operate most weapons on my own, I incorporated chamber checks into every weapon I could do that on.
If you do not know how to operate firearms (most weapon types follow the same principles, but switches and charging handles will be in different locations), it is best to have an “RSO” (Range Safety Officer) perform these actions for you. It’s important to clearly communicate how you want each action executed.
Some Tips I've Learned Recording Firearm Foley
- Foley should always be done with live ammunition (Please be safe and ALWAYS work with your range safety officer), as I’ve found charging weapons without ammunition sounds dull and misses the element of the round being chambered. Sometimes dummy rounds work, but they’re often not made of the same material as live ammunition, so results will vary.
- Don’t use dummy plastic shotgun rounds they don’t sound great.
- Charging-handle Foley should be performed at a moderate to moderately fast pace.
- Magazine reloads should be recorded with either a full magazine only, or both full and empty variations. Empty magazines lack weight and you often hear a spring and empty resonance.
- Weapon inspection sounds — grabbing, turning, and lightly shaking the weapon — should be done with a full magazine inserted, as it usually adds more character.
I record Foley from 2–3 feet away using KMR81i’s, with an additional mono 8050 placed 6 feet back. This gives me two distinctly different perspectives to blend from. I also use a Sanken CO-100K at 3 feet for added top-end detail and clarity.
Recording Discoveries
Personal Firearm Recording Discoveries
After recording multiple different M4s and AKs of the same caliber from different manufacturers, I’ve discovered that, up close, the mech layer and shot layer showed noticeable differences in tonality. I’ve recorded several M4s with similar barrel length, and up close, they did not sound as identical as one would think. This surprised some sound designers who questioned why we were recording basically the same rifle more than once, assuming they would all sound the same. We completely debunked that assumption. Differences in bolt carrier groups, receiver construction, and barrel length made these small character changes.
Over time, I’ve identified several elements that alter the performance and sound of a weapon:
- Type of magazine ex: Stick/ Drum or even different manufactures (Changes the RPM)
- Barrel length (Changes the shot layer and initial reflections)
- Receiver material / different manufacturers (Changes the mechanical resonance)
- Spring tension in the magazine (Changes the RPM)
- Buffer & buffer spring (Changes the RPM)
- Adjustable gas block (Changes the RPM)
- Adding a suppressor (Changes the RPM and overall sound)
- Dry or properly greased internals (Changes the RPM)
- Gas blocks from different manufacturers (Can potentially change the RPM)
- Finicky weapons that prefer certain magazines over others (Changes the RPM)
I was recording an MK18 one night and it was cycling slowly. We swapped out the buffer spring for a stronger one, and it immediately fired faster.
Another night I recorded a G3 with two different magazines from two different manufacturers and when I switched mags the rifle fired significantly faster and smoother, preferring the second mag I used over the first. I also discovered that many rifles fire faster as the spring tension in the magazine lightens as it empties. As the upward pressure decreases, the cycling becomes freer, subtly increasing the rate of fire.
Microphone Choices Early Weapon Recording Career Mistakes
Early in my recording career, I made mistakes that shaped the way I approach firearm sessions today. When I first started out, I blew two SM57s and two D112s, both placed three feet away from the firearm and pointed directly at the muzzle. These microphones were chosen based on there SPL specs (Drum kit recording microphones). Both of these microphones were successfully destroyed when trying to record the SCAR-17 and later were also destroyed when recording the Browning M2-AN. After learning those lessons the hard way, I became much more careful about microphone selection and placement.
I discovered the SM137, a microphone that has become the backbone of my weapon recordings. It delivers exceptional clarity, handles extreme SPL reliably, and remains cost-effective enough to deploy in high-risk positions. I primarily use SM137’s and Sennheiser MKH 80 series for most of the close-mid range shot and initial reflection perspectives. The 8050/8040 series has proven equally dependable in high-SPL environments, offering slightly more detail and an extended frequency response up to 50kHz.
For the mechanical layer, I rely on two DPA 4062’s for the attached mech perspective and a stereo pair of Neumann KMR81i mt’s for the unattached, both of which have proven to be reliable under most circumstances.
Mic Placement Additions Over the Years
For the first two years, 2022–2023, of Master Gun we relied on a 20 mic setup and I thought it was enough. Later in 2024, we were suggested to add a couple extra ORTF perspectives and attached mech lavs to the setup. After those perspectives were added, I realized I was lacking in the mid-range area between 15–30ft from the shooter. Once those changes were implemented, I began slowly re-recording certain important firearms with the improved setup to update them to the current 32 mic configuration.
Master Gun AK-12 - 32 Microphones
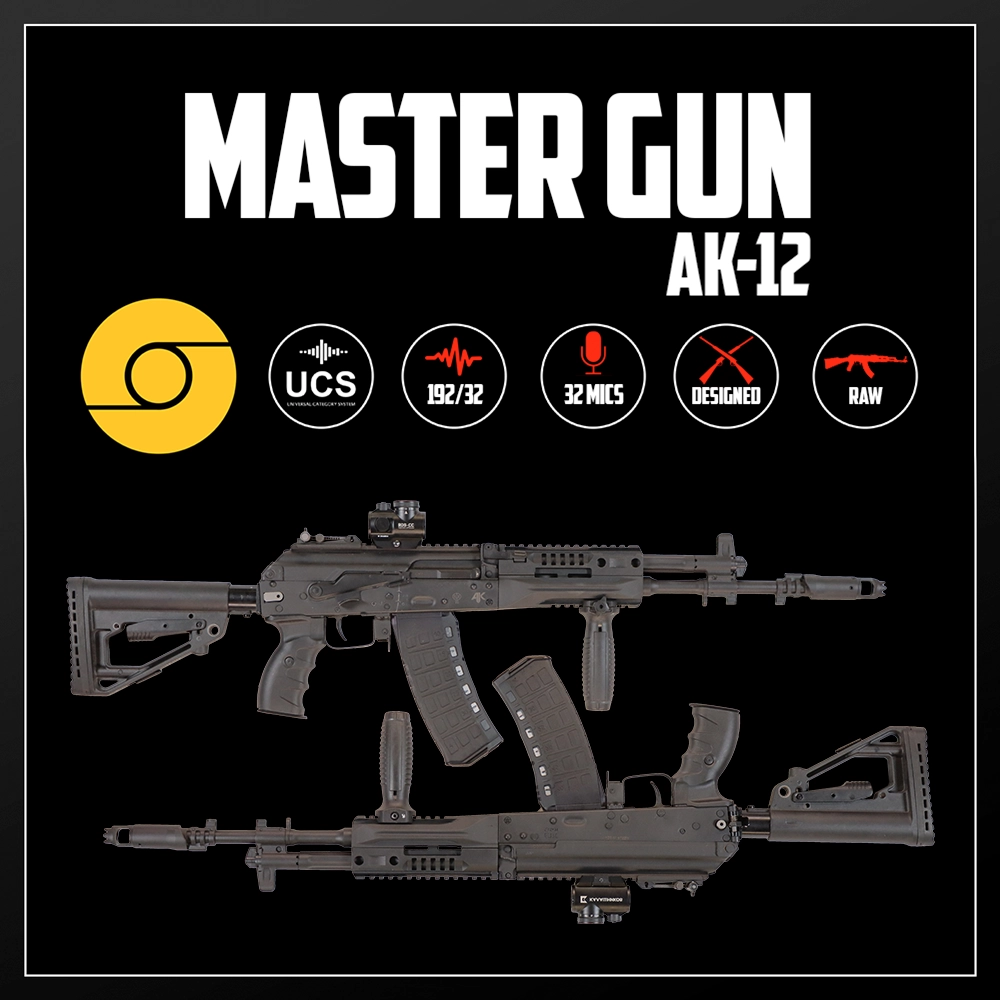
Master Gun AK-12 - 20 Microphones

Conclusion
Recording firearms comes down to understanding each sonic layer, knowing where to place microphones to capture what you want, selecting the proper microphones for each perspective, and choosing the right environment to preserve the weapon’s unique signature. It’s not about how many mics you have. If you go into a session knowing exactly what you want, this article should help you accomplish it with clarity and intention, without unnecessary experimentation.
Play, have fun, and be safe.


